Talking steel automation
Automation has taken steel analysis to a whole other level.
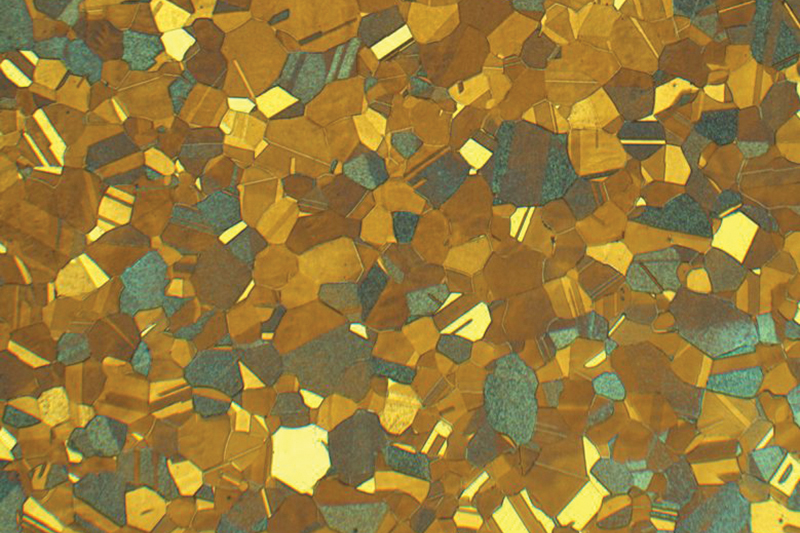
a car body panel © Struers
Our understanding of materialography has evolved over generations, as has the technology and equipment we use to prepare and analyse samples. By extension, so has the demand in material analysis and steel is no exception to this rule.
Manually preparing a steel sample for optical microscopy can be challenging – those with experience and knowledge will find it easier and quicker than an individual new to the process.
However, once a preparation method has been developed, the next set of challenges comes when the quantity is increased to more than 100 samples daily.
Steel is used in various applications and traditionally has a high throughput in a production area, resulting in a high demand for analysis in a laboratory. It is vital that the highest standards of performance and quality remain for each and every sample.
Semi-automatic and automatic equipment must be used to prepare these in large quantities. This allows multiple samples to be prepared simultaneously.
Typically, six samples will run through the process at once, although this varies depending on sample size. As a result, the speed of sample production increases six-fold. It is also safer, while using fewer consumables and therefore reducing the cost per sample.
The downside to semi-automated preparation is that staff still need to change grinding and polishing surfaces and clean the samples. This is where a fully-automated system shines.
Automated equipment will do all the above for you. It is widely accepted as the solution for consistency and process accuracy. It removes the risk of human error – the samples simply need to be loaded and the correct method selected.
For grinding and polishing, automation results in greater process efficiency and certainty. It completely removes any manual cleaning steps between samples – instantly saving time and money in any laboratory.
Paint layers
There has been a notable increase in samples with paint layers. While examining a specific defect would require targeted preparation, examining the paint layer thickness and how well it has adhered to the metal substrate can be done en masse to ensure consistency across production.
The paint can be a thin layer, so many who prepare the samples often forget that the layer can be broken or pulled away from the metal substrate if care is not taken.
Depending on the size of the initial piece, the recommendation is to mount the sample in epoxy before cutting. If this is not possible, the next best option is always to ensure that the substrate supports the paint layers. If not, the cut-off wheel can pull the paint layer from the substrate.
Unnecessary damage from the cutting stage will always result in a long initial grinding step.
Edge rounding in samples can cause uncertainty when analysing the layer thickness under a microscope. Mounting the samples in epoxy after the cutting step can help significantly reduce this issue.
Still, if the samples have moisture, grime or grease, then the epoxy will not correctly adhere to the sample. Known as edge shrinkage, it creates a gap between the epoxy and the sample, allowing water, grinding and polishing media and debris to get lodged. Therefore, ensuring all the samples are carefully cleaned and thoroughly dried before mounting is essential.
It is also worth avoiding touching the samples with your bare fingers and using tweezers or wearing gloves at this point, or else it will undo the sample cleaning.
Grind and shine
Grinding and polishing can usually be divided into four categories – plain grinding, fine grinding, diamond polish and oxide polish. Choosing the correct surface and abrasive particle side for the plane-grinding step depends on the depth of the damage from the cut against time. The fastest removal will come from larger abrasive sizes, however, this has a drawback.
Silicon carbide (SiC) papers and polishing cloths all have compression – when two materials with different hardness are ground and polished together, it means the materials will be removed at different rates. Eventually, this creates a sample with different levels and is often referred to as relief.
We get more dreaded edge rounding near an edge, even when mounted. SiC paper with larger abrasive particles will create more edge rounding on samples than one with smaller abrasive particles.
This is where grinding disks come to the rescue. A grinding disk uses abrasive particles on a metallic disk. As the disk does not compress, there would be no edge rounding. However, disks with large abrasive particles can be too aggressive for the paint layer. This is why it is recommended to use an MD-Largo disk with 9µm DiaDuo-2 diamond suspension as the fine grinding step to remove the edge rounding from the SiC paper used for the plane grinding step.
As mentioned earlier, polishing cloths can be significantly compressed, particularly when moving to smaller abrasive particles. After a fine grinding step at 9µm, the first diamond polish step is typically at 3µm. Depending on the thickness of the paint layer and the analysis being carried out, it may be possible to finish at this point.
The steps recommended for preparing soft-medium steels are:
- Silicon carbide abrasive paper 220 grit
- MD-Largo, a metallic grinding disk combined with a 9µm diamond suspension such as Diaduo-2 9µm
- MD Dac, an acetate woven cloth combined with a 3µm diamond suspension such as Diaduo-2 3µm
- MD-Chem, a neoprene cloth combined with colloidal silica such as OP-S
When examining paint layers, we are not concerned with the substrate’s microstructure, so instead of finishing on an oxide polish, we may prefer to go to a 1µm or even a ¼µm finish.
Steady hands
Automation has improved steel analysis. It ultimately comes down to greater control than what can be done by hand. We can control the force applied to the sample, the surface's rotations per minute, and the duration each step runs for with greater accuracy.
It also means that if an issue does appear during the preparation process, it's much easier to identify what went wrong and when it did. Moreso, it also makes it easier to adjust the equipment parameters to correct the issue.
This also has the bonus of being reproducible, combined with the ability to prepare multiple samples simultaneously. There is an increased throughput of samples with minimal input from the end user.
Automation also means that when researching and developing a new or altered material for a specific application, the preparation method does not have to be developed multiple times – it can simply be copied and applied to other automatic preparation equipment.
By implementing automation, companies can test samples off the production line much faster and more consistently.


